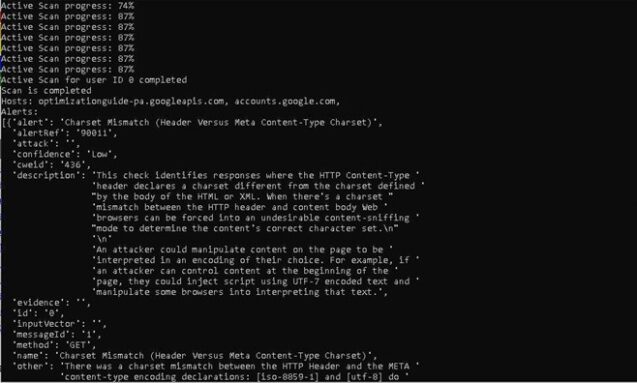
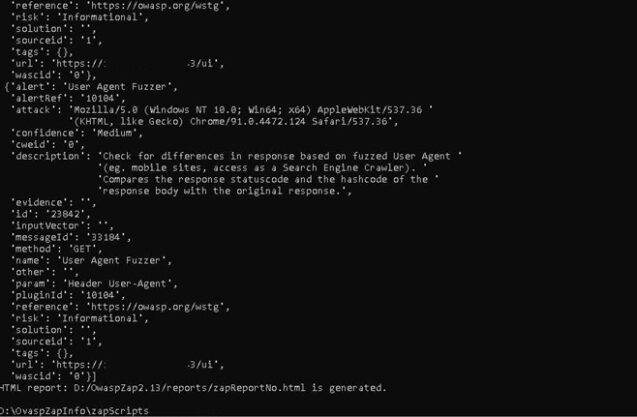
It is possible to use OWASP ZAP (ZAP) for this purpose. ZAP provides an Application Programming Interface (API) that allows you to interact with ZAP programmatically. ZAP API Documentation is used for running a standalone Python script that makes API calls to the ZAP program. ZAP can run Python (and other languages) from within the app, but it can’t run Python 3 (at the moment of writing this article). Probably, you can see a similar error while trying to run some Python3 scripts for scanning:
There are several possible reasons why the ZAP API Python script for active automated scanning of web applications is failing to run in Python 3.
One possible reason is that the script may have compatibility issues with Python 3. Additionally, there may be issues with installing the required repositories for python-owasp-zap, or with the configuration of the ZAP daemon.
What do you need to do to use the Python 3 script within Zap API?
To run the ZAP API Python script for active automated scanning of web applications in Python 3, follow these steps:
First, you can check if the ‘zapv2’ Python module is installed using the ‘pkgutil’ module:
If it is not, Install the ZAP Python API client using the command: ‘pip install zaproxy’
Select the standalone Python script from Zap API Documentation that you want to use for running or create your own Python script. Make sure you have the following steps in this script:
2.1 Import the Python API client for ZAP in your Python script ` from zapv2 import ZAPv2 `
2.2 Connect to the ZAP instance API endpoint by providing the host and port for the ZAP instance as an argument to the module `zap = ZAPv2(proxies=localProxy, apikey=apiKey)` and check if the necessary API key and proxy settings are configured correctly:
` localProxy = {“http”: “http://127.0.0.1:<port>”, “http”: “https://127.0.0.1:<port>”}` Check that your API keys match the key in Zap UI, for this purpose
Go to Tools
=> Options… -> API and click “Generate Random Key” (for example, if the API key is set as “dsl21524545454sedasaszec”, so in this case make sure your Python script is using that key: apikey=”dsl21524545454sedasaszec”)
2.3 Set up the context for the scan by creating a new context and adding URLs to it
2.4 Set up the authentication for the scan by creating a new user and configuring the authentication method
- Launch ZAP running Zap as a daemon:
Zap is now listening on localhost: <port>:
- Run the Python script:
I recommend using examples of Python scripts from Zap API Documentation. The script will start a new scan with the given context ID using the ZAP API, performing passive and active scanning.
5. Wait for the scan to complete and retrieve the scan results
6. Analyze the scan results and take appropriate actions to fix the vulnerabilities found.
When using ZAP API for active scanning of web applications, there are some potential problems that you may face. Here are some of the challenges that you may encounter:
- Slow or unstable performance: ZAP may be slow or unstable, especially when dealing with large or complex web applications. It can consume a lot of memory or CPU resources, which can affect the performance of your system.
- False positives: ZAP may generate false positives, which are security issues that are reported as vulnerabilities but are not actually exploitable. On the other side, Zap may also generate some alerts as False negatives, which are security issues that are not detected by the tool.
- Risk of damaging the web application: ZAP is a powerful tool that can simulate real attacks on web applications. However, if not used properly, it can damage the web application by modifying data or inserting malicious scripts.
To avoid the above-mentioned problems, I advise using ZAP API properly and following best practices for web application security testing. I recommend combining automated scanning with manual testing. This will help you to identify real vulnerabilities and avoid marking them as false positives, to ensure comprehensive coverage of security issues.
Related Cases: A Showcase of Diverse Web Solutions
Outstaffing for Web App Development for a Top-Notch Insurance Company
Web Design for a Healthcare Company
Web Application for Seamless Subtitle Management
Web Application Development for a Swiss Interior Design Studio
Web Application for ICO Investments and Management
Masternodes Investment Web Platform
Web App for IoT Devices Monitoring
Web App Development for Remote Orders Making
Text-to-Speech Web Application
Web Solution for Mental Health Clinics


