


This article is written by Elinext’s software developer Ivan Polyakov who wants to share his expertise with those who aren’t familiar with the Lambda service or haven’t used it in conjunction with the API Gateway service.
According to the official documentation, Lambda allows you to execute the code without a server and without installing and setting up an environment. The code is executed only when necessary, with the automatic scaling, and one has to pay only for the time spent on the code execution itself. It worth noting that the first million requests per month come free of charge.
Currently, Lambda supports the following languages: Node.js, Java, C#, Go and Python.
Function creation
Now let’s get down to business. In essence, the whole code is a collection of functions. The process goes as follows: you create a function, configure the access policy to other AWS resources, if any, and attach a trigger to a function. A trigger can be represented by any event of the services available for a choice.
To create a function, there is a “Create function” button, located either on the “Dashboard” page or on the “Functions” page.

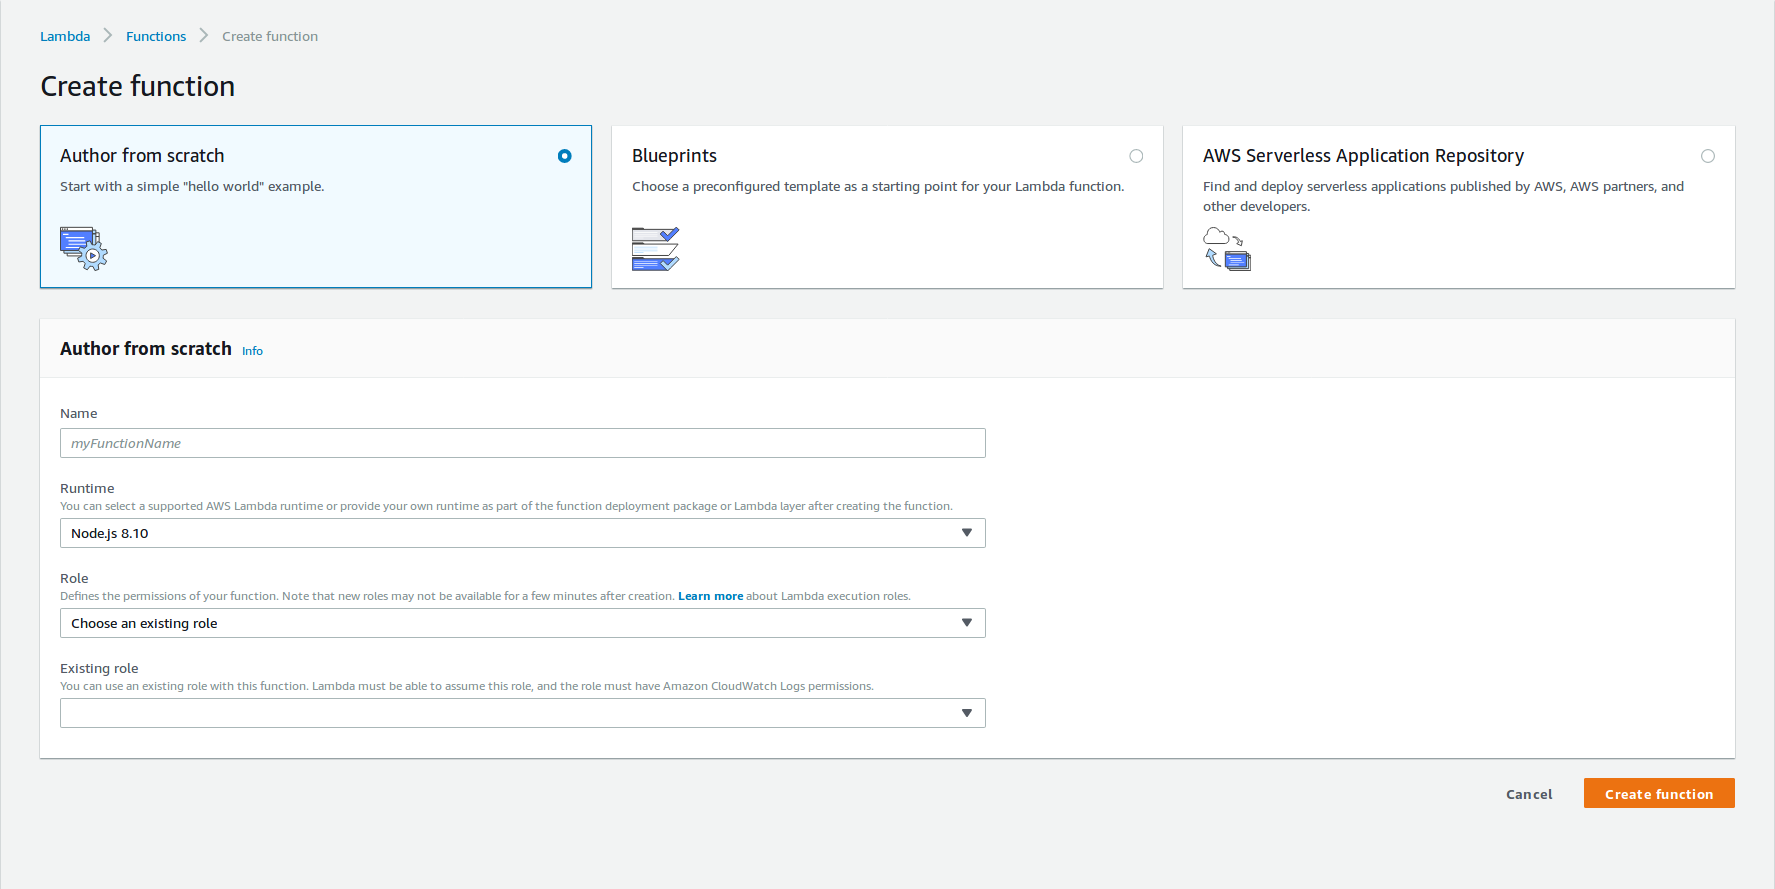
Here you can create a function from scratch (“Author from scratch”) or select from the set of available “Blueprints” templates. In this article we will consider only the first option. Since this option is already selected by default, let’s fill in the form of 4 fields :
- Name
Actually, the name of a function that will be displayed in the list and used for the call. In our case, it will be myHelloWorld.
- Runtime
The language in which the function will be written. In our case, it will be Node.js 8.10.
- Role
The role determines the access rights of a function to other AWS resources. We will create a new role and add a full access to the CloudeWatch service, which stores all the logs received from a function at runtime. For that, choose the “Create a new role from one or more” item. After that, the new “Role name” and “Policy templates” fields will appear.
- Role name
In our case, it will be myHelloWorldRole.
- Policy templates
Here is the actual list with the available permissions to access other services. We need only “Simple microservice permission”.
- Existing role
In this field, you can select a previously created role, which will be done when creating subsequent functions. After the form is filled, click on the “Create function” button. Straight after the function creating process, we should be sent to the configuration page.
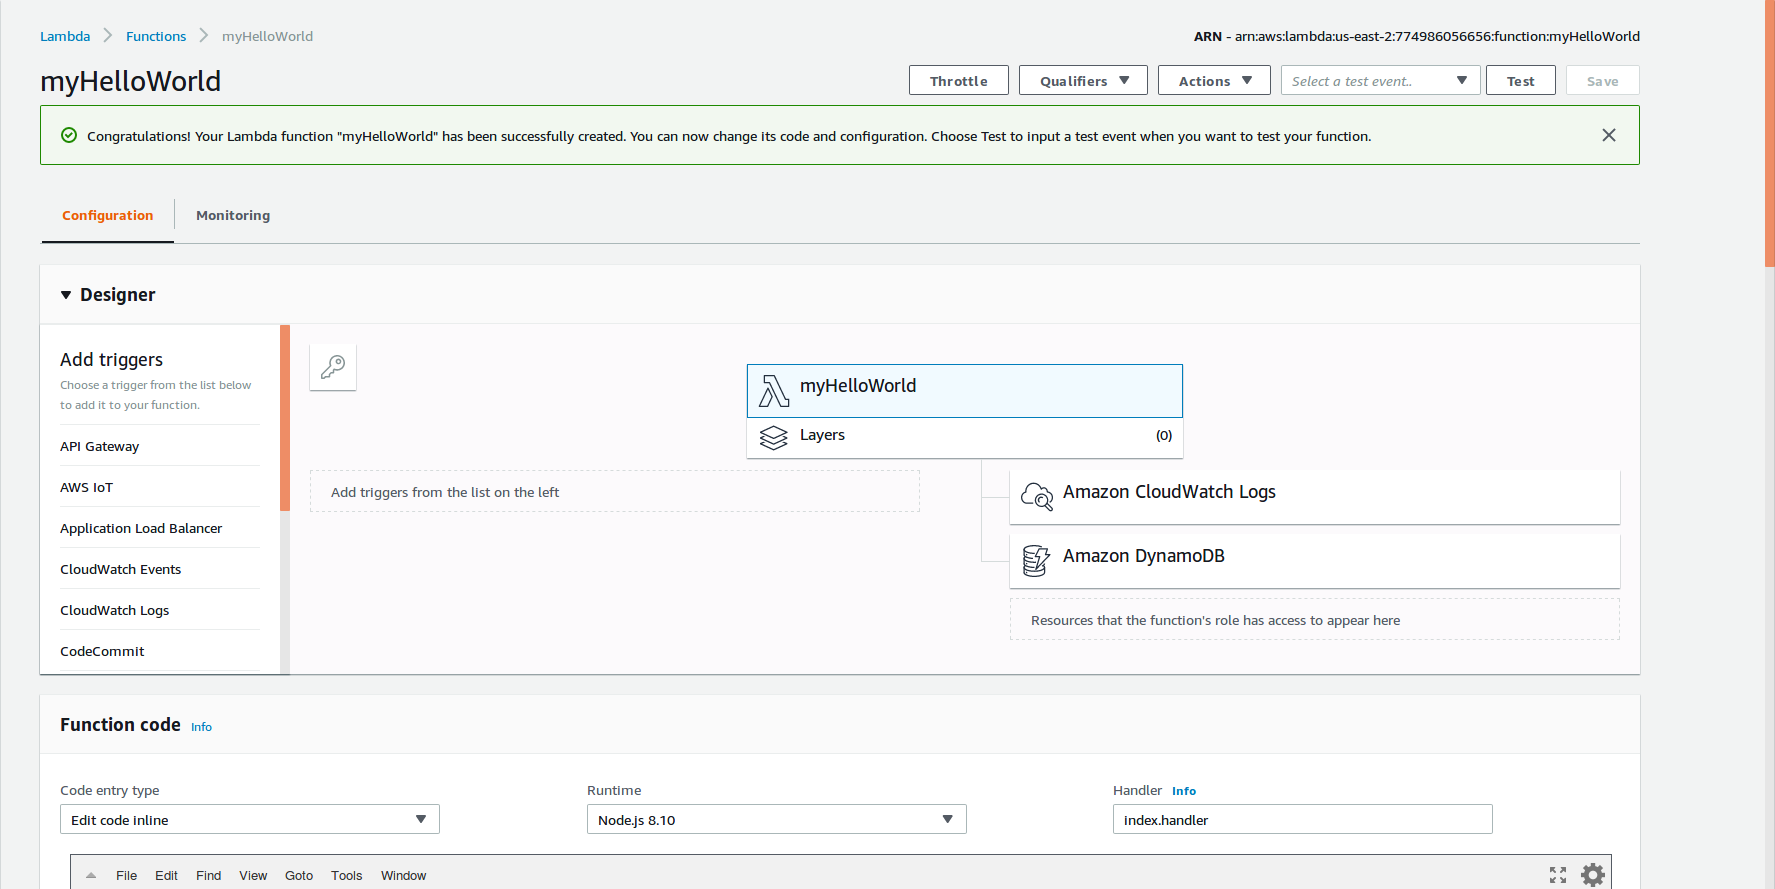
This is the main page for working with a function, where the code changes, setting up triggers and access rights to resources will occur.
Updating a role
By default, our created role does not have all rights to write logs. What leads to the loss of logs made by console.log(). Therefore, we will add a full access to the CloudWatch service. To make this happen, we will need the IAM console. To get there quickly, click on the “Amazon CloudWatch Logs” block, and in the block that appears below, click on the “Manage these permissions” link.


Testing the code
The function testing can be done on the management page. To do this, there’s a special interface with settings and the ability to create tests. To create a test, click on the “Test” button located opposite the function name.

In the opening window, we will be able to configure the test parameters. But we will not consider it now in detail and just click on the “Create” button leaving everything by default. The only field that needs to be filled is the “Event name”. In our case, the name will be myHelloWorldTest.
Now, by pressing the “Test” button again, the test itself will be executed. The results will be displayed on the same page. It contains the function response, logs and other execution parameters.
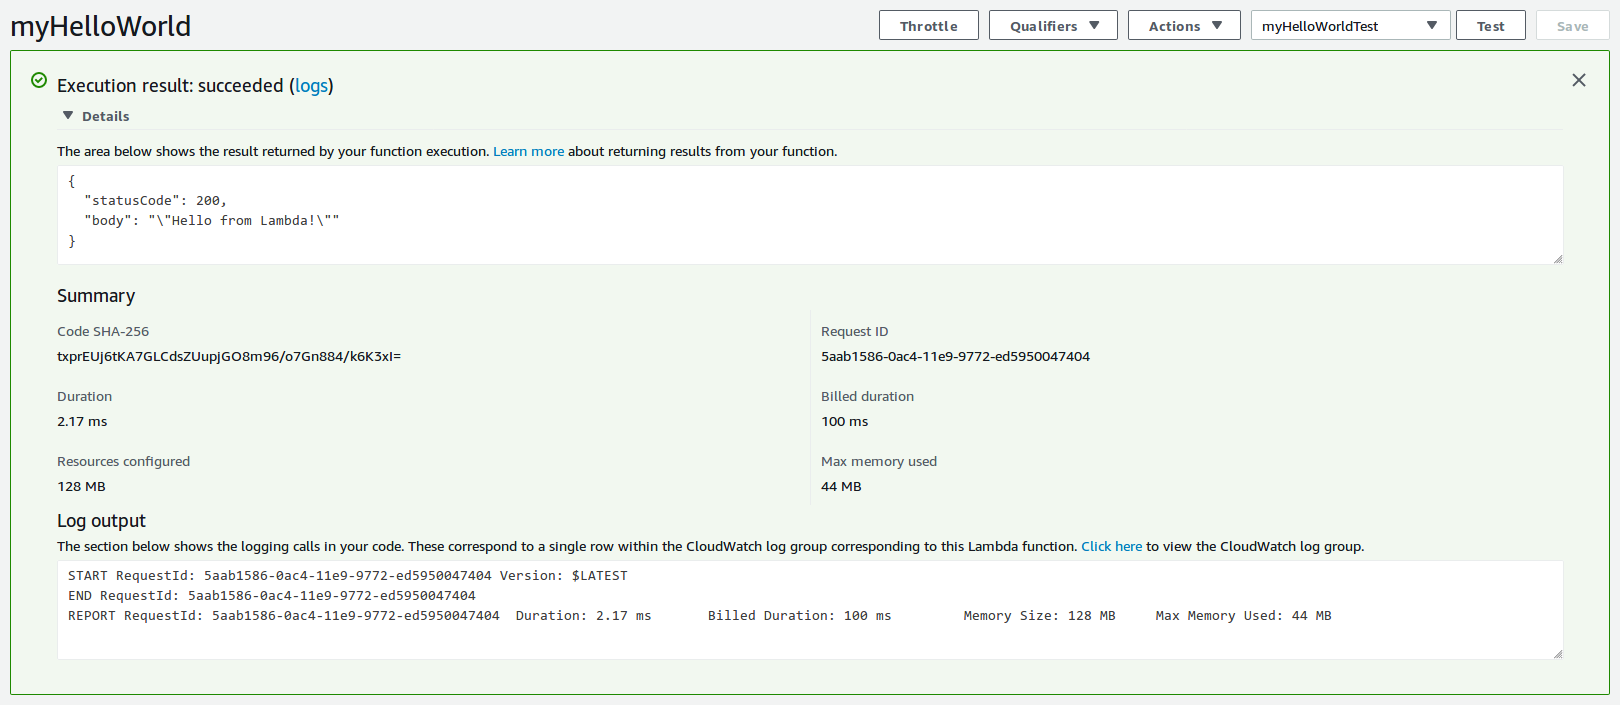
{
“statusCode”: 200,
“body”: “\”Hello from Lambda!\””
}
You might be surprised – where did it come from? The fact is that by default the function was created with the base code that looks like this:
exports.handler = async (event) => {
// TODO implement
const response = {
statusCode: 200,
body: JSON.stringify(‘Hello from Lambda!’),
};
return response;
};
It can be found in the built-in editor on the same page. It’s a very convenient editor, by the way.
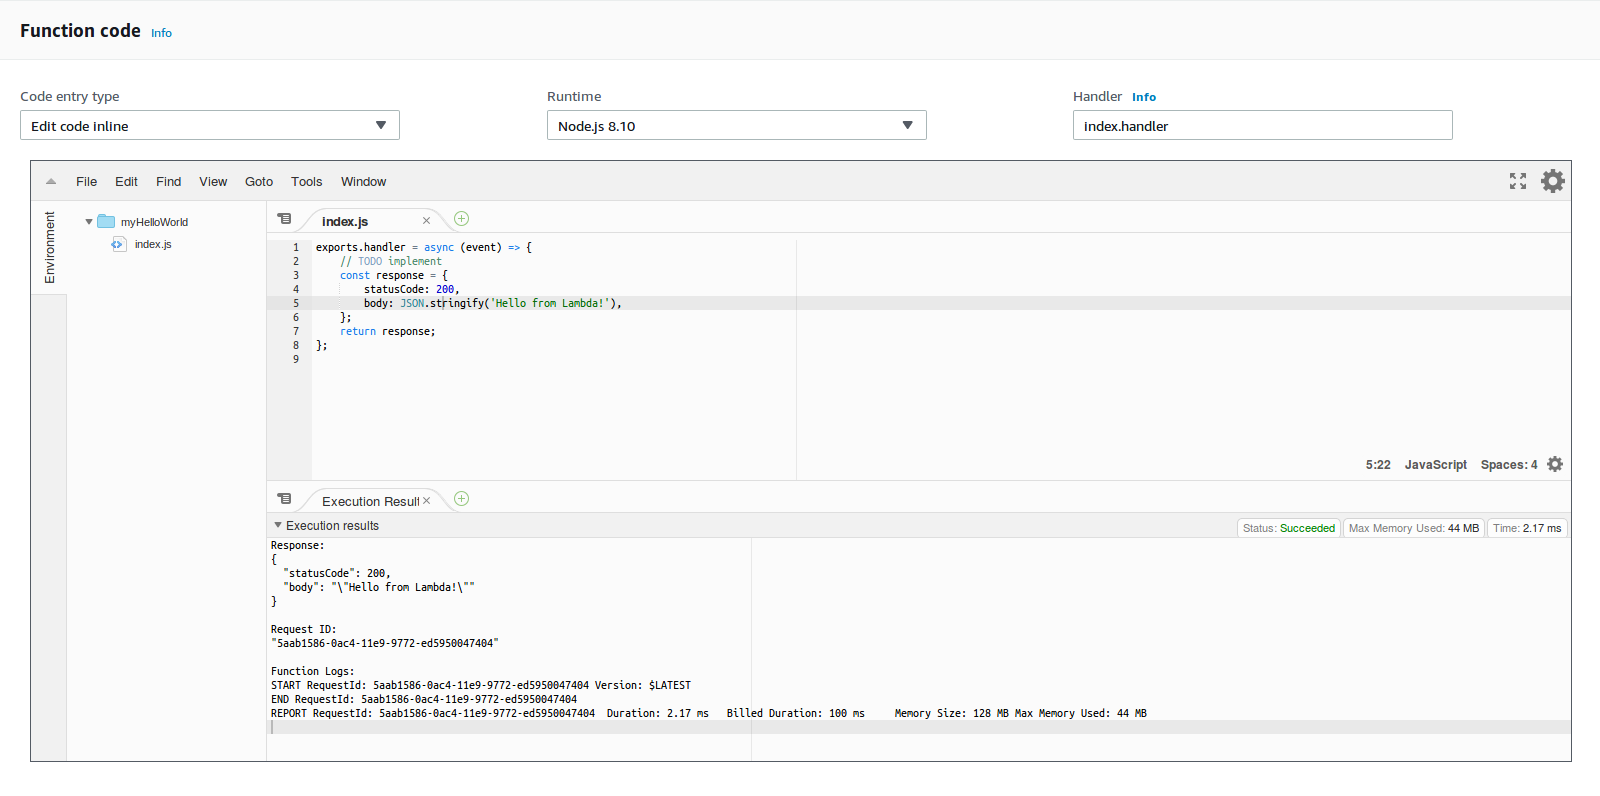
Watching the logs
When testing, logs are displayed directly in the test results and the built-in editor. In addition, for each function call including testing, logs are recorded in the CloudWatch service. For our function a separate group /aws/lambda/myHelloWorld will be created in which all logs will be stored.
If we need to log something inside a function, it will be available through the console.log().
For example, if we replace the // TODO implement string in the code with console.log(123); and run the test, we will be able to see our value in the CloudWatch logs.

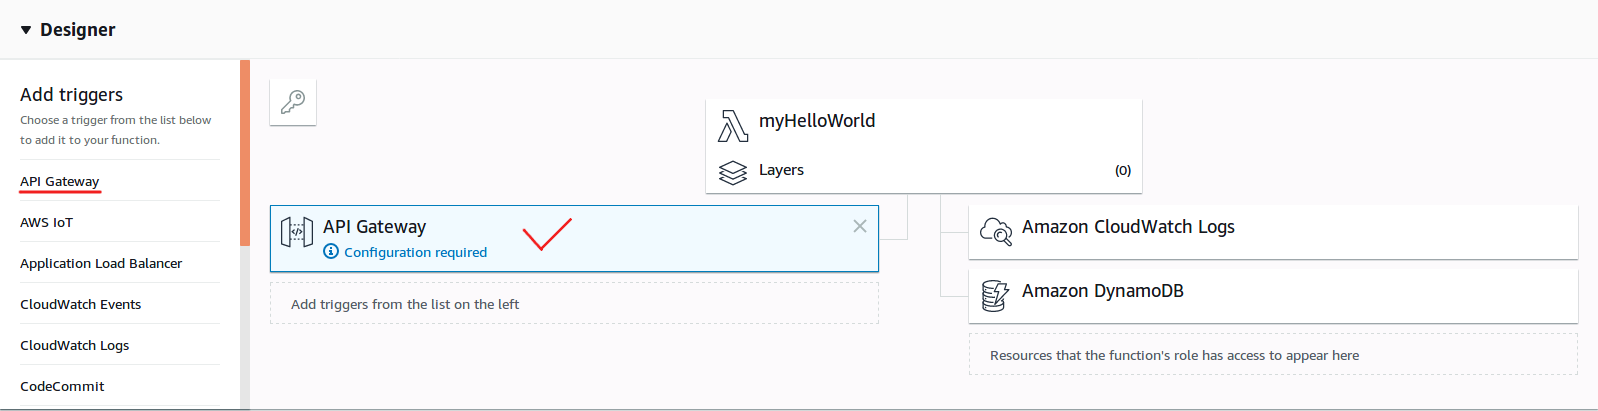
Adding a trigger
Now, when we have a function, we need to call it somehow. For this, there is a set of triggers located on the configuration page in the “Designer” section:

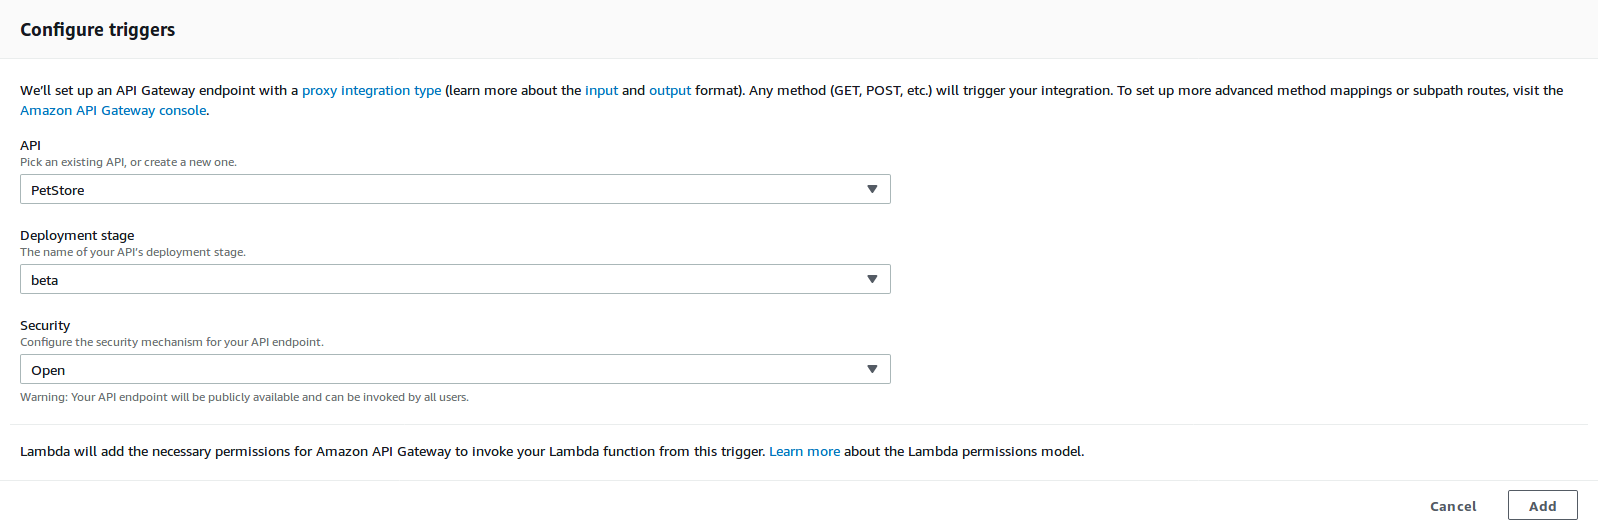


Now all it takes is to check the result by clicking on the method link, which looks something like this https://bzgtygguh9.execute-api.us-east-2.amazonaws.com/beta/myHelloWorld
In the response, we should see the text returned by the function “Hello from Lambda!”
Conclusion
Eventually, we have a full-featured REST API with the ability to create any end points. One endpoint which is a trigger for lambda function. One lambda function on Node.js. What did it take us to have such results? Just a couple of hours and literally zero money. The most important moment is that we have used just 3 services. These are API Gateway, Lambda and CloudWatch. We didn’t need any servers or EC2 instances, we also didn’t have to install and configure a working environment. Of course, at first, it will not be easy to learn all the features of implementing such functions. But the result of their application looks impressive.
